Restoring the Iconic Floating Roof: MINI Cooper / S 2002-2006 (R50/R53) Quarter Glass Replacement
The 2002-2006 MINI Cooper and Cooper S (chassis codes R50 and R53) completely redefined the modern compact car segment. Beyond its legendary go-kart handling and the unmistakable supercharger whine of the R53, this first-generation BMW-era MINI introduced a revolutionary "floating roof" design. This striking visual illusion relies heavily on the seamless, wraparound aesthetic of the rear quarter glass. When your MINI's quarter glass is shattered due to a break-in, a rogue rock on the highway, or an unfortunate collision, it doesn't just compromise your vehicle's security—it completely shatters the iconic silhouette and aerodynamic profile of your car.
As the premier auto glass experts serving the Greater Toronto Area (GTA), we understand that finding specialized care for early 2000s European vehicles can be a challenge. Whether you are navigating the busy industrial sectors of Vaughan, commuting through the dynamic neighborhoods of Richmond Hill, or parked in a quiet suburban driveway in Markham, a broken quarter glass exposes your MINI's interior to the harsh, unpredictable Ontario elements. Our elite mobile auto glass replacement service brings dealership-level expertise directly to your doorstep.
Unlike standard roll-down door windows, the quarter glass on the MINI Cooper R50/R53 is a stationary, encapsulated piece of tempered glass. It is chemically bonded directly to the vehicle's metal frame using high-strength automotive-grade urethane. This structural bonding means that replacement is not a simple, do-it-yourself bolt-on job. It requires precision cutting, meticulous surface preparation, and a master technician's understanding of auto glass adhesion. Furthermore, because quarter glass is typically crafted from tempered safety glass, an impact will cause it to explode into thousands of tiny, granular shards that infiltrate every crevice of your MINI's rear cabin. At AlexWindshield, we handle this complex procedure with unmatched precision.
The Master Technician's Process: A to Z Quarter Glass Replacement for the R50/R53
At AlexWindshield, we don't just replace auto glass; we engineer a perfect, factory-grade seal. The exactness of our methodology ensures your vehicle remains structurally sound and whisper-quiet on the road. Here is our comprehensive, step-by-step masterclass on how we execute a flawless quarter glass replacement for your 2002-2006 MINI Cooper.
Step 1: Comprehensive Interior Protection and Site Preparation
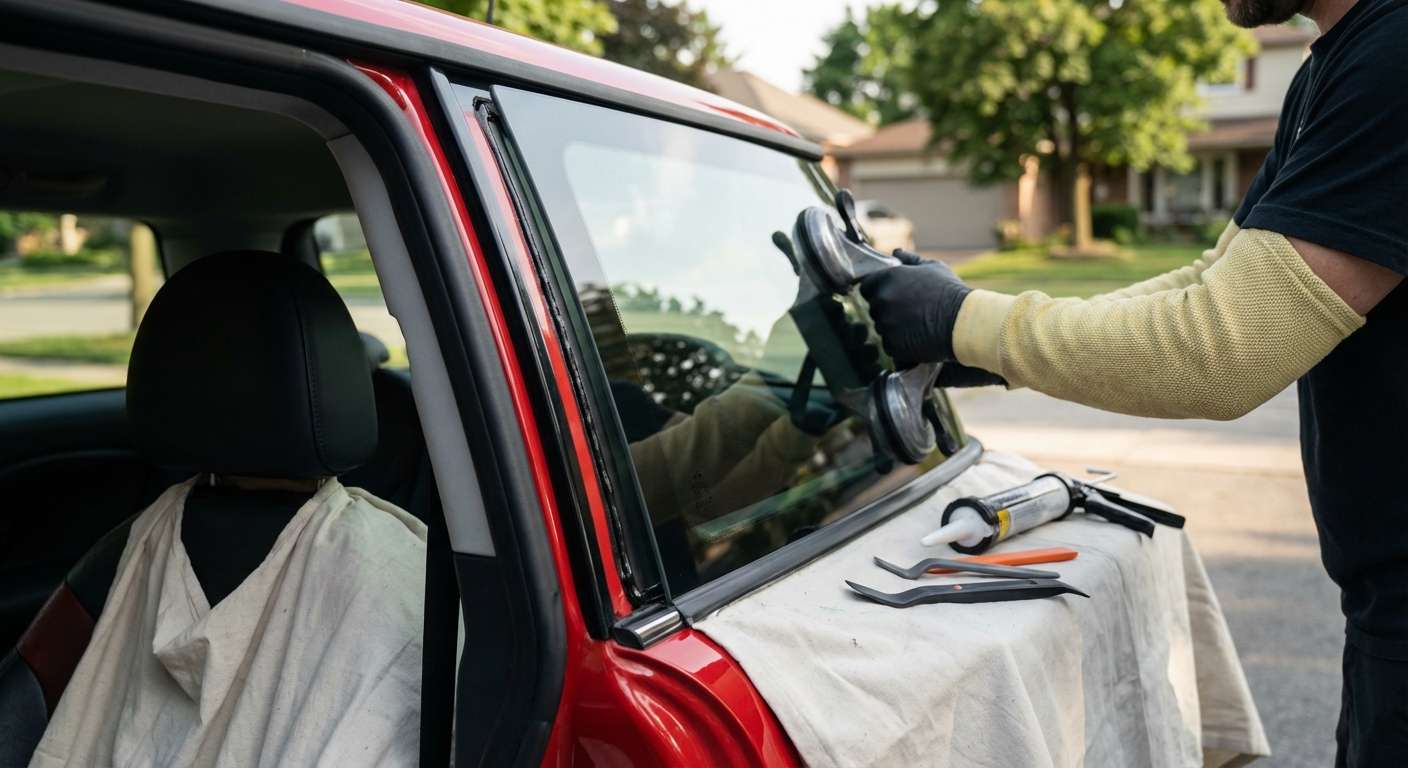
Before any tools are lifted from our mobile service van, our absolute priority is protecting the interior of your beloved R50 or R53. We begin by outfitting our master technicians in heavy-duty safety gear, including Kevlar sleeves and safety glasses. We then lay down heavy-duty protective drop cloths over the rear seats, the trunk area, and the exterior body panels surrounding the damaged quarter window. We apply specialized automotive masking tape around the window frame to ensure that our sharp cutting tools never make accidental contact with your MINI's paintwork or clear coat.
Step 2: Deep Interior Dismantling and Glass Shard Extraction
Because the quarter glass is tempered, a break results in a massive shower of glass. To ensure a safe and rattle-free driving experience post-repair, we carefully remove the interior C-pillar trim, the rear parcel shelf supports, and carefully pull back the interior carpeting where necessary. Using high-powered industrial vacuums equipped with specialized micro-crevice tools, we extract every single shard of broken glass from the interior. We vacuum deep inside the rear quarter body panels, inside the seatbelt retractor housings, and throughout the trunk lining. Leaving even a single shard behind can cause annoying rattles while driving or present a hidden safety hazard to your passengers.
Step 3: Precision Removal of the Old Encapsulation and Urethane
Once the interior is completely free of glass debris, the remaining structural rim of the old quarter glass must be surgically removed. Using advanced braided wire-cutting systems and specialized cold knives, our master technicians carefully slice through the incredibly tough factory urethane bead that bonds the glass to the vehicle's body. We ensure that the cut is clean and steady, maintaining the structural integrity of the pinch weld (the metal frame lip where the glass sits). For the MINI R50/R53, this requires a delicate touch around the wraparound corner near the rear hatch to avoid damaging the adjacent weather stripping.
Step 4: Pinch Weld Preparation and Rust Prevention
Once the old glass frame is completely removed, we are left with the original urethane bead still attached to the vehicle. We use razor-sharp, specialized scraping chisels to trim the old adhesive down to a thin, even layer of approximately 1 to 2 millimeters. This meticulous process, known as leaving a "base bead," provides the absolute optimal surface for the new urethane to chemically bond to. We then rigorously inspect the bare metal pinch weld for any signs of rust or accidental scratching. Given the changing seasons and heavy road salt used across the GTA, Vaughan, Richmond Hill, and Markham, treating any bare metal immediately is critical to prevent future rust corrosion from destroying your car's body.
Step 5: Rigorous Surface Cleaning and Primer Application
Both the vehicle's pinch weld and the new replacement quarter glass undergo a stringent, multi-stage cleaning process. We use a specialized, lint-free cloth and an alcohol-based glass cleaner to remove any microscopic dust, grease, or manufacturing residues from the new glass. Next, we apply a high-tech glass prep activator to the black ceramic frit band of the new auto glass. Following this, we brush a premium automotive glass primer onto any exposed metal on the pinch weld and directly onto the edge of the new glass. This black primer acts as a vital chemical bridge, preventing rust and ensuring an unbreakable, permanent bond between the urethane adhesive, the vehicle body, and the new window.
Step 6: Laying the High-Quality Urethane Adhesive
The secret to a factory-grade, watertight seal lies in the adhesive application. We use only the highest-quality, rapid-curing automotive urethane available on the market today. Using an electric, battery-powered caulking gun for absolute consistency, we extrude a perfectly uniform, continuous "V-bead" of urethane along the prepared pinch weld. The V-shape is crucial; when the quarter glass is firmly pressed into place, the peak of the V collapses evenly, spreading out to form a watertight, airtight, and structurally sound bond without any weak air pockets or gaps.
Step 7: Precision Installation, Alignment, and Curing
With the fresh urethane applied, the new quarter glass is meticulously hoisted into place. Alignment on the MINI R50/R53 is absolutely critical to maintain the seamless flow of the signature floating roof aesthetic. We use specialized suction cups to perfectly position the glass, ensuring the tight tolerances and gaps between the door glass, the roofline, and the rear hatch are factory-accurate. Once perfectly seated, we apply specialized retention tape to hold the glass firmly in place while the urethane undergoes its initial chemical cure. We carefully calculate the Safe Drive-Away Time (SDAT) based on the current temperature and humidity in the GTA, ensuring your car is 100% safe to drive before we hand back the keys. Finally, we reinstall all interior trim pieces, perform a final vacuuming, and clean the newly installed quarter glass to a brilliant, streak-free shine.
Why the Right Glass Quality Matters for Your Classic MINI
The prominent black ceramic band (known as the frit) on the edge of the quarter glass is highly visible on the R50/R53 chassis. Using cheap, substandard aftermarket glass often results in mismatched tint levels, wavy reflections, or irregular black borders that instantly ruin the car's sleek aesthetic. At AlexWindshield, we refuse to compromise on quality. We source only OEM (Original Equipment Manufacturer) or premium OEE (Original Equipment Equivalent) auto glass. This strict standard guarantees a flawless fit, the correct aerodynamic curvature, and factory-matched tinting, completely preserving the authentic British-Bavarian styling of your classic MINI.
Expert Mobile Auto Glass Service Across the GTA
A shattered quarter window is a highly stressful event, leaving your car completely vulnerable to theft, vandalism, and harsh weather. You shouldn't have to risk driving a compromised vehicle across town with howling wind and rain roaring through the cabin. That is exactly why AlexWindshield offers comprehensive, white-glove mobile auto glass replacement. Our fully equipped, state-of-the-art service vans act as rolling auto glass workshops, bringing our master technicians directly to your location.
- Vaughan: Whether you are hard at work at a commercial job site or parked out front at Vaughan Mills, our technicians arrive promptly with all the specialized tools needed to perform a flawless quarter glass replacement directly on site.
- Richmond Hill: Do not let a maliciously broken window ruin your busy schedule. We serve the entirety of Richmond Hill, providing fast, highly efficient, and impeccably clean auto glass repair right in your driveway.
- Markham: From quiet residential streets to sprawling corporate parking lots, our mobile response team delivers true dealership-quality auto glass replacement to Markham residents, saving you massive amounts of time, stress, and costly towing fees.
Trust AlexWindshield: Your GTA Auto Glass Masters
Replacing the structurally bonded quarter glass on a classic 2002-2006 MINI Cooper or Cooper S (R50/R53) demands much more than basic mechanical knowledge; it requires the precise, steady hand of a master technician. From the meticulous interior extraction of thousands of dangerous, broken glass shards to the flawless, calculated application of premium urethane adhesive, every single step must be executed with absolute perfection.
When you choose to work with AlexWindshield, you are choosing an elite team that treats your vehicle with the ultimate respect and care it deserves. We stand proudly and firmly behind our unparalleled craftsmanship, which is exactly why every single quarter glass replacement we perform comes entirely backed by our comprehensive, ironclad Lifetime Warranty against water leaks, wind noise, and any workmanship defects. If you are located in the Greater Toronto Area and require expert auto glass care, trust the dedicated professionals who know your specific vehicle inside and out. Do not settle for less than perfection. Contact AlexWindshield today and let us flawlessly restore the iconic look, safety, and structural integrity of your beloved MINI Cooper.


