Precision Back Glass Replacement for BMW X5 (G05) 2019-2027
The BMW X5 (G05 chassis), produced from 2019 through 2027, is more than just a luxury SUV; it is a marvel of Bavarian engineering, featuring a distinct split-tailgate design that defines its utility and aesthetic profile. Unlike standard SUVs where the rear glass is a simple pane set into a lifting hatch, the G05 incorporates complex telemetry, radio antenna integration, and a specific heating grid layout within the upper liftgate assembly. When this glass shatters—whether due to road debris on Highway 407, vandalism, or a backing accident—it disrupts not just the vehicle's security, but its sophisticated electronic ecosystem. At AlexWindshield, we do not simply swap glass; we restore the structural integrity and factory specifications of your ultimate driving machine.
The AlexWindshield Mobile Advantage in the GTA
Driving a shattered BMW X5 across the Greater Toronto Area is dangerous and risks further damage to your premium leather interior from falling glass shards. We bring the workshop to you. As the leading mobile auto glass specialists, we provide same-day service specifically tailored to:
- Vaughan: From Woodbridge to Maple, our technicians are stationed for rapid response.
- Richmond Hill: We service residential driveways and office parking lots near Yonge and Major Mackenzie.
- Markham: Whether you are near Unionville or box grove, our mobile units are fully equipped to handle complex BMW installations on-site.
Understanding the G05 Rear Glass Architecture
The BMW X5 G05 back glass is tempered safety glass, designed to shatter into thousands of small, pebble-like pieces upon impact to prevent injury. However, because the X5 features a sophisticated split-tailgate (clamshell design), broken glass often migrates into the latching mechanisms, the rear wiper motor housing, and the delicate electronic control modules located in the tailgate. A generic glass shop might leave debris behind that causes rattling or mechanical failure months later. At AlexWindshield, our Master Technicians follow a rigorous protocol to ensure every shard is removed.
Step-by-Step Technical Replacement Process
Replacing the rear windshield on a 2019-2027 BMW X5 requires patience, specialized tools, and a deep understanding of the vehicle's assembly. Below is our comprehensive, A-to-Z workflow.
Phase 1: Site Preparation and Vehicle Protection
Before any tools touch your vehicle, we secure the perimeter. The BMW X5 paintwork is premium, and we treat it as such.
- We apply automotive-grade protective tape to the rear spoiler, the lower tailgate section, and the rear quarter panels to prevent accidental scratches during glass removal.
- Interior protective covers are placed over the cargo area and the rear seats to catch falling debris.
- If the glass is still partially intact but shattered, we apply a retention film to hold the pieces together during removal.
Phase 2: Interior Trim Removal and Deconstruction
This is where our expertise distinguishes us from general repair shops. To access the glass bedding and clean out the debris, we must disassemble the interior of the upper tailgate.
- Panel Removal: Using non-marring plastic pry tools, we carefully detach the upper and side interior trim panels of the liftgate. This exposes the wiper motor assembly and the defroster connectors.
- Spoiler Disassembly: On the G05 model, the rear spoiler often overhangs the glass. We carefully loosen or remove the necessary spoiler retaining bolts to ensure the new glass can slide in without contacting the paint.
- Disconnecting Electronics: We unplug the rear defroster heating elements and the radio antenna connectors. These connectors are fragile on BMWs; forced removal can snap the soldering tabs. We use precision picks to release the locking clips safely.
- Wiper Assembly: The rear wiper arm goes through the glass. We remove the wiper arm nut, extract the arm, and remove the rubber grommet sealing the motor shaft.
Phase 3: Broken Glass and Urethane Removal
Once the frame is exposed, the physical removal begins.
- Vacuuming (Round 1): We use a high-powered industrial vacuum to remove all loose glass from the exterior frame and the immediate interior cargo space.
- The Cut-Out: Using a specialized oscillating tool or a cold knife, we cut through the existing urethane bead that bonds the glass to the pinch weld. We aim to leave a thin, flat layer of the original factory urethane, which serves as the best base for the new bond.
- Vacuuming (Round 2 - Deep Clean): This is critical. We insert flexible vacuum attachments into the hollow cavities of the tailgate door shell. We manipulate the tailgate (opening and closing it) to shift hidden glass shards into accessible areas for extraction. This prevents the dreaded "maraca effect"—the sound of glass rattling inside your door when you drive.
Phase 4: Surface Preparation and Priming
A leak-free, safe installation relies on chemical preparation.
- Cleaning the Pinch Weld: We scrub the metal frame with a specialized contaminate remover to eliminate dirt, silicone, and grease.
- Priming: Any bare metal scratches created during removal are covered with a rust-inhibiting black primer. This prevents corrosion that could eventually compromise the vehicle's structural integrity.
- Glass Preparation: The new BMW-spec glass is cleaned. We apply a glass activator to the ceramic band (the black frit) on the new glass to ensure the adhesive bites chemically into the surface.
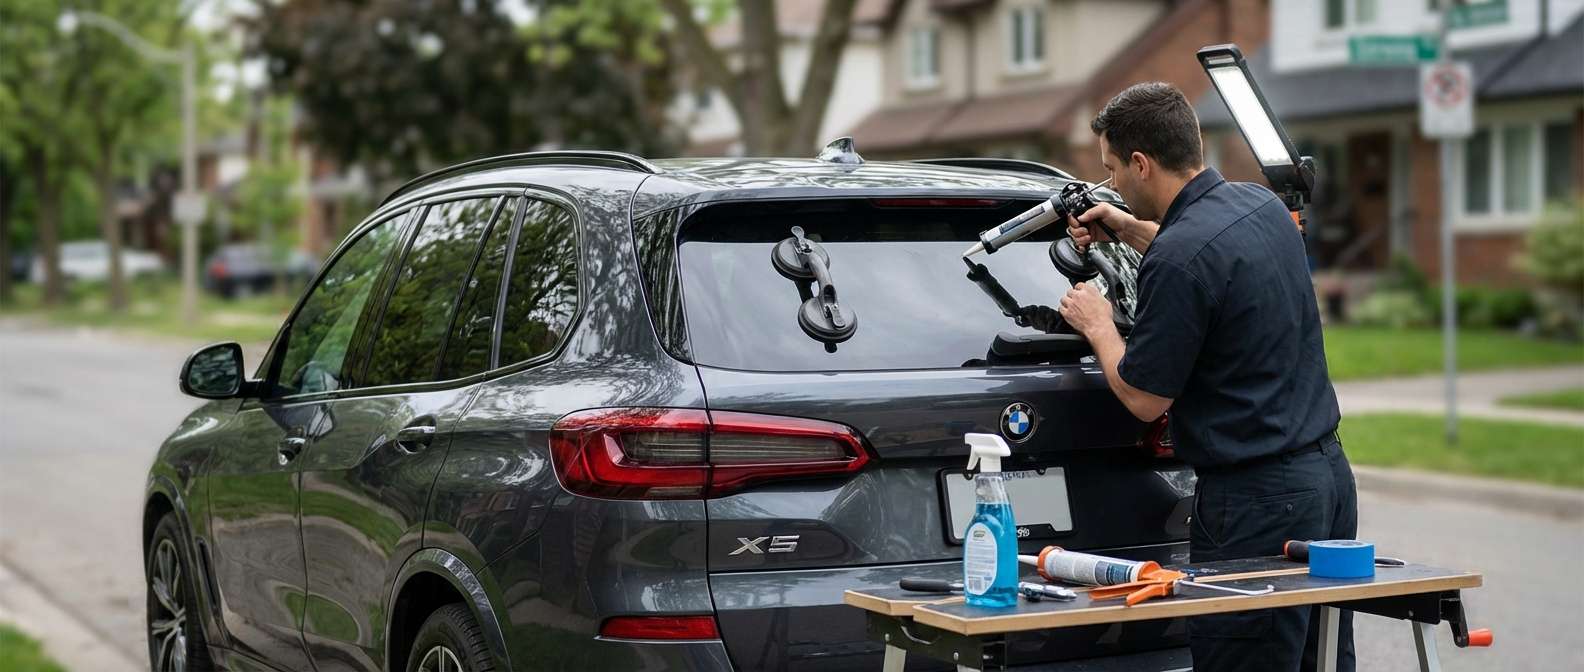
Phase 5: Adhesive Application and Installation
We use only high-modulus, non-conductive urethane (specifically Sika or DuPont), which is required for BMW vehicles to prevent interference with the diversity antenna systems embedded in the glass.
- The V-Bead: We apply a triangular "V-bead" of urethane. This shape ensures that when the glass is pressed down, the glue spreads evenly without air pockets, mimicking the factory robot's application.
- Setting the Glass: Two technicians (or one using a specialized setting tool known as a "Lil Buddy") carefully lift the glass and place it onto the vehicle. We align the glass with the roofline and the side pillars, ensuring the gaps are symmetrical and meet BMW's tight tolerances (typically 3mm-4mm gaps).
- Reconnecting Systems: Once the glass is seated, we reconnect the heating grid wires and antenna leads. We reinstall the wiper grommet and wiper arm immediately to ensure proper alignment through the new glass hole.
Phase 6: Reassembly and Final Inspection
With the glass bonded, we reverse the deconstruction process.
- We reinstall the interior trim panels, replacing any plastic clips that may have been stressed during removal to ensure a rattle-free fit.
- We test the rear defroster to ensure the electrical circuit is complete.
- We test the rear wiper function to ensure full range of motion without contacting the paint or glass edge.
- A final cleanup is performed, vacuuming the cargo area one last time to ensure it is pristine for the owner.
OEM Quality Glass vs. Aftermarket
For a vehicle of the caliber of the BMW X5 (G05), glass quality is non-negotiable. At AlexWindshield, we prioritize the use of OEM-equivalent (Original Equipment Manufacturer) glass. This ensures that the curvature matches the body lines perfectly, the solar tint matches the rest of the vehicle (ensuring privacy and UV protection), and the heating elements have the correct resistance values to function with the BMW climate control module. Cheaper, low-quality glass often suffers from visual distortion ("waves" in the glass) and poor fitment that results in wind noise at highway speeds.
Why the "Cleanup" Matters Most
When a back glass shatters, thousands of cubes of tempered glass fly everywhere. In the BMW X5, the battery and fuse box are often located under the cargo floor. If conductive glass dust or shards enter these areas, it can cause electrical shorts. Furthermore, glass left inside the tailgate latch can cause the mechanism to jam, leading to an expensive "soft-close" motor repair. AlexWindshield takes the extra time that quick-lube places won't. We vacuum the carpets, the spare tire well, and inside the door shell itself.
Lifetime Warranty and Trust
We stand behind our craftsmanship. Every back glass replacement performed by AlexWindshield comes with a Lifetime Warranty against leaks, wind noise, and workmanship defects for as long as you own the vehicle. We understand that your BMW X5 is a significant investment, and our service is designed to protect that value.
Do not compromise on safety or quality. For expert BMW X5 back glass replacement in Vaughan, Richmond Hill, Markham, and the entire GTA, trust the specialists.
Contact AlexWindshield today to schedule your mobile service. drive with clarity and confidence.


