Premium Sunroof Replacement for BMW X1 (F48) 2016-2022: Restoring Your Panoramic View
The BMW X1 (F48 generation, 2016-2022) is a masterclass in compact luxury, blending sporty dynamics with versatile utility. One of its most defining features is the expansive panoramic sunroof, which floods the cabin with natural light and creates an open-air driving experience. However, when this complex glass assembly is compromised—whether by a stray highway rock, a falling tree branch, or the rare phenomenon of spontaneous tempered glass breakage—the luxury experience instantly turns into a safety hazard and a source of stress.
At AlexWindshield, we understand that a broken sunroof on a German-engineered vehicle requires more than just a quick fix; it demands surgical precision. A BMW sunroof is an integral part of the vehicle’s aerodynamics and structural rigidity. Improper installation can lead to catastrophic water leaks, wind noise, and electrical failure. As Master Technicians serving the Greater Toronto Area (GTA), we specialize in the specific nuances of the F48 chassis.
If you are located in Vaughan, Richmond Hill, or Markham, our mobile auto glass specialists bring OEM-level service directly to your driveway. Below, we detail the rigorous, step-by-step technical process we use to replace the sunroof glass on your BMW X1, ensuring it returns to factory specifications.
The Technical Complexity of the BMW F48 Panoramic Roof
The panoramic roof system on the 2016-2022 BMW X1 typically consists of two glass panels: the front movable element and the rear fixed element. Replacement protocols differ depending on which panel is damaged, but the requirement for precision remains constant. Unlike a standard side window, the sunroof interacts with a complex system of rails, cables, motors, and drainage tubes.
When you choose AlexWindshield, you are choosing technicians who understand the specific torque specifications and alignment geometries of the BMW F48. We do not cut corners. We utilize OEM-equivalent glass that matches the tint, thickness, and curvature of your original factory roof, ensuring seamless integration.
Step-by-Step Replacement Process: From Preparation to Calibration
Transparency is the hallmark of a true professional. Here is the detailed "A to Z" procedure our technicians follow when replacing the panoramic sunroof glass on your BMW X1.
Step 1: Site Setup and Interior Protection
Before any tools touch your vehicle, we prioritize the protection of your luxury interior. BMW leather and Alcantara headliners are susceptible to damage if not properly shielded.
- Interior Masking: We apply high-grade protective covers to the front and rear seats, the center console, and the dashboard.
- Exterior Protection: The roof paint surrounding the sunroof opening is taped off with non-marring automotive masking tape to prevent accidental scratches during glass removal.
- Debris Containment: If the glass has shattered, we place drop cloths over the entire cabin floor to catch falling shards during the removal process.
Step 2: Glass Removal and Debris Extraction
If the glass is cracked but intact, removal is straightforward. However, most sunroof incidents involve tempered glass that has shattered into thousands of granular pieces.
- bulk Glass Removal: We carefully remove the larger remaining chunks of glass from the frame, wearing cut-resistant gloves to ensure safety.
- Vacuuming the Mechanism: This is a critical step often skipped by budget shops. We use high-powered industrial vacuums with narrow nozzle attachments to extract glass shards from the sunroof tracks, the rail mechanism, and the wind deflector assembly. Glass left in the tracks will grind against the gears, causing motor failure later.
- Interior Detailing: We vacuum the seats, carpets, and crevices of the vehicle to ensure no glass remains inside the cabin.
Step 3: Accessing the Frame and Headliner Management
For the rear fixed panel of the panoramic roof, or extensive repairs to the front panel, we must gain access to the underside of the mounting points.
- Trim Removal: We carefully remove the necessary A-pillar and B-pillar trims, sun visors, and overhead grab handles.
- Headliner Lowering: We gently lower the headliner (the fabric ceiling) just enough to access the mounting bolts or cut through the old urethane adhesive from the underside, without creasing the backing board.
- Electrical Disconnect: We disconnect the overhead console wiring harnesses to prevent short circuits during the repair.
Step 4: Surface Preparation and Primer Application
The longevity of the replacement depends entirely on the bond. For the fixed rear glass panel which is bonded to the vehicle body, we follow a strict chemical preparation protocol.
- Old Adhesive Removal: We pare down the old urethane bead on the vehicle frame to a height of approximately 1-2mm, providing a fresh base for the new bond.
- Chemical Cleaning: The bonding surface of the new glass and the vehicle frame is cleaned with a specialized solvent to remove silicone, grease, and road oils.
- Primer Application: We apply a high-quality black primer to the frit band (the black ceramic edge) of the new glass and any exposed metal on the pinch weld. This primer serves two purposes: it promotes molecular adhesion and protects the urethane from degrading under UV solar radiation.
Step 5: Adhesive Application and Glass Installation
This is the moment where precision is paramount. We use high-modulus, non-conductive Sika or Dow automotive urethane adhesive.
- Adhesive Bead: A triangular bead of high-viscosity adhesive is applied to the glass or the vehicle frame (depending on the specific BMW service manual instruction for the F48). The triangular shape ensures the bead does not trap air bubbles when compressed.
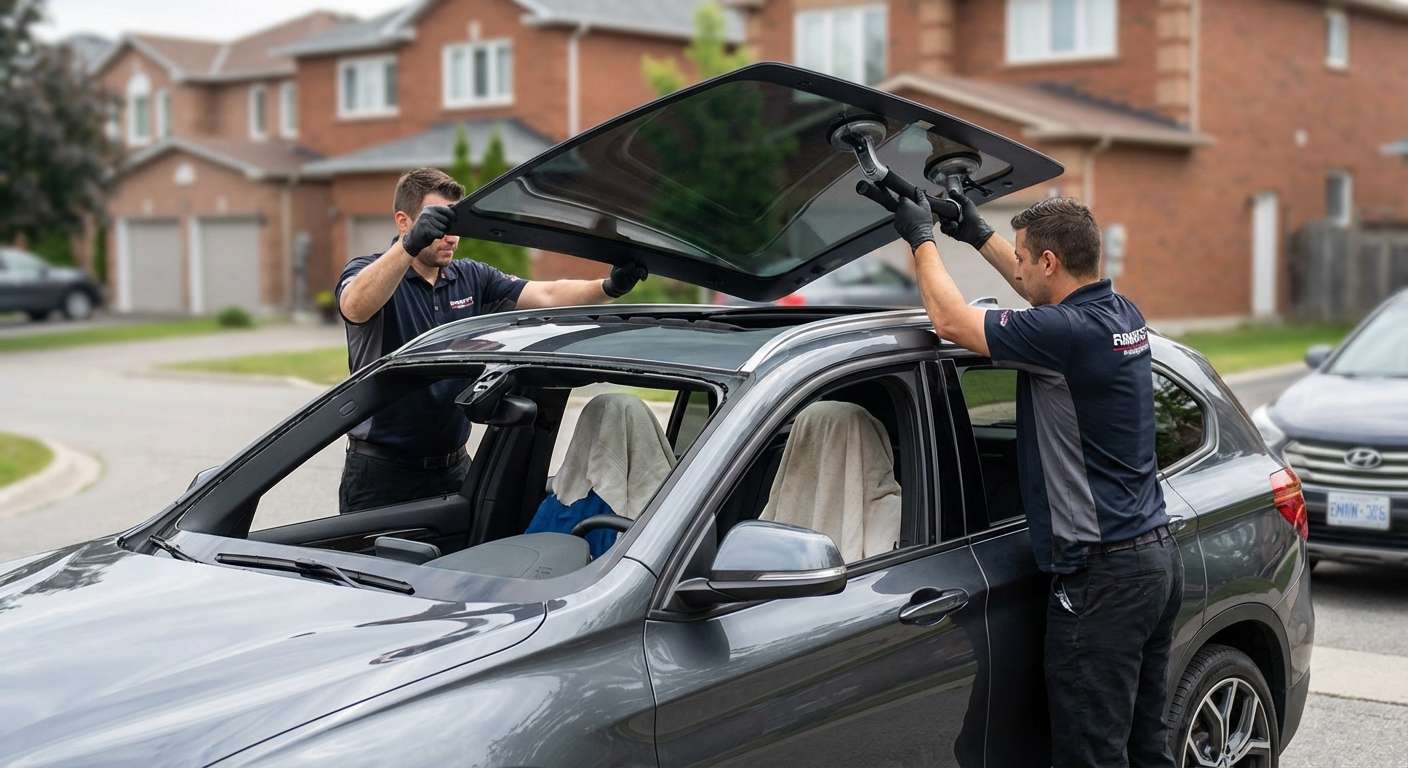
- Setting the Glass: Using suction cups, two technicians carefully lower the new panoramic glass panel into the opening.
- Alignment: We adjust the glass to ensure the gaps between the roof panel and the glass are symmetrical (usually 3-4mm). This is vital to prevent wind noise at highway speeds on the 407 or 401.
- Torqueing (For Movable Panels): If replacing the front movable panel, we secure the T25 Torx screws to the specific torque settings required by BMW, ensuring the glass sits flush with the roofline.
Step 6: Drain Tube Verification
A common issue with sunroof replacements is blocked drains, leading to water entering the footwells. As part of our service, AlexWindshield technicians perform a flow test.
- We pour water into the sunroof channels to verify that the four corner drain tubes are clear and flowing freely to the ground.
- If blockages caused by glass shards are found, we use compressed air to clear the lines before reassembly.
Step 7: Reassembly and Initialization
Once the glass is secure, we reverse the disassembly process.
- Headliner Reinstallation: The headliner is raised back into position, and all pillars, handles, and visors are reattached with their original clips and screws.
- Motor Initialization: This is a mandatory step for the BMW X1. The sunroof motor must "learn" the resistance and position of the new glass. We perform the initialization sequence (often holding the tilt button for 15-30 seconds) to calibrate the anti-trap function and ensure the glass closes tightly against the seals.
Local Service Availability: Vaughan, Richmond Hill, and Markham
Your time is valuable. Driving a vehicle with a shattered roof across the city is dangerous and uncomfortable. That is why AlexWindshield brings the repair shop to you. Our mobile units are fully equipped to handle BMW sunroof replacements across the entire Greater Toronto Area (GTA).
We have a particularly strong presence in:
- Vaughan: From Woodbridge to Maple, we service residential driveways and office parking lots.
- Richmond Hill: Whether you are near Yonge Street or Bayview, our technicians can reach you quickly.
- Markham: We cover the entire Unionville and Markham area, providing on-site glass replacement rain or shine (weather permitting, or under cover).
Why Trust AlexWindshield for Your BMW X1?
Replacing a panoramic roof is significantly more difficult than replacing a door glass or windshield. It requires an understanding of water management, electronics, and structural bonding.
1. Expert Technicians: Our team is trained specifically on European vehicles. We know the F48 platform inside and out.
2. Lifetime Warranty: We stand behind our workmanship. We offer a Lifetime Warranty against water leaks, air leaks, and manufacturer defects in the glass for as long as you own the vehicle.
3. Premium Materials: We refuse to use subpar adhesives or distorted aftermarket glass. We use materials that meet or exceed BMW’s own strict safety standards.
Book Your Sunroof Replacement Today
Don’t let a broken sunroof compromise the integrity of your BMW X1. Rain, snow, and theft are real risks when your vehicle is exposed. Trust the local experts at AlexWindshield to restore your vehicle to its showroom condition.
Contact us today to get a free quote for your BMW F48 sunroof replacement. Experience the convenience of mobile service in Vaughan, Richmond Hill, and Markham, backed by the assurance of a Master Technician's touch.


