The 2005-2008 MINI Convertible (R52): Preserving the Open-Air Experience with Precision Glass Care
The 2005-2008 MINI Convertible, internally designated as the R52 chassis, isn't just a vehicle; it is a bold statement of open-air motoring freedom wrapped in an iconic, retro-modern British design. However, the true joy of driving this dynamic compact convertible relies heavily on the structural integrity and precise alignment of its specialized glass components. When the vent glass of your R52 MINI is compromised—whether by a rogue highway pebble, a break-in, or severe weather—it doesn't just disrupt the aesthetics of your vehicle; it compromises cabin security, introduces severe wind noise, and invites water ingress that can damage the delicate convertible top mechanics and interior electronics. At AlexWindshield, we understand that replacing the vent glass on a highly engineered European convertible is not a standard task. It requires the trained eye and steady hand of a Master Technician.
Why Specialized Care is Crucial for R52 MINI Vent Glass
Unlike standard sedans, the MINI Convertible (2005-2008) features a complex interplay of weather-stripping, soft-top tension mechanisms, and tight cabin tolerances. The vent glass acts as a crucial barrier that must align perfectly with the rolling windows and the folding roof. A subpar installation can lead to the notorious "MINI whistle" at highway speeds or, worse, persistent leaks that pool water under your premium carpets. As a senior auto glass specialist, I have witnessed countless DIY repairs and rushed jobs that ultimately cost the owner thousands in secondary interior damage. You need a replacement that utilizes OEM-quality glass, industry-leading urethane adhesives, and a rigorous, step-by-step methodology designed specifically for the R52 platform.
Unmatched Mobile Auto Glass Service in the Greater Toronto Area (GTA)
A shattered vent glass leaves your MINI vulnerable to the elements and theft, meaning you shouldn't be forced to drive it to a repair shop. AlexWindshield brings the repair shop directly to you. We provide comprehensive, fully equipped mobile auto glass services across the Greater Toronto Area (GTA). Whether you are at a corporate office park in Markham, parked in a residential driveway in Richmond Hill, or out running errands at a shopping center in Vaughan, our mobile fleet arrives on-site with all the necessary tools, premium adhesives, and precision-cut glass to restore your MINI to factory conditions. We pride ourselves on delivering top-tier local SEO-optimized services that our GTA community can rely on in their moments of need.
Our Master Technician's Step-by-Step R52 Vent Glass Replacement Process
Replacing a bonded vent glass on a 2005-2008 MINI Convertible is an intricate procedure. As a Master Technician, I adhere to a strict A-to-Z protocol that ensures safety, longevity, and a flawless finish. Here is an inside look at how AlexWindshield executes this critical repair.
Step 1: Thorough Pre-Inspection and Interior Protection
Before any tools are lifted, we conduct a comprehensive assessment of the damage. We inspect the surrounding metal framework, the rubber weather-stripping, and the convertible top seals for any collateral damage. Following the inspection, we prioritize the protection of your MINI's interior. We meticulously cover the premium leather or cloth seats, the center console, and the footwells with heavy-duty protective blankets and masking tape. The R52's compact cabin leaves zero room for error, and protecting your vehicle's interior from chemical drips or stray tools is our first technical mandate.
Step 2: Comprehensive Glass Cleanup and Debris Removal
When a side vent glass shatters, thousands of tempered glass cubes explode into the cabin and deep into the door and body cavities. Because this glass is adjacent to the door and rear quarter panels, we mandate a rigorous vacuuming process. Using high-powered industrial HEPA vacuums, we extract every single broken glass shard from the seats, floor mats, and the intricate folds of the convertible top mechanism. Leaving even a single shard behind can cause annoying rattles, pose a safety hazard, or bind up the window regulator and convertible top tracks in the future.
Step 3: Door Panel and Interior Trim Disassembly
To fully access the vent glass mounting points and clear out the internal debris, we must carefully disassemble the interior panels. Using specialized non-marring trim tools, we remove the inner retaining clips, unscrew the Torx fasteners hidden behind the door handles and armrests, and delicately lift away the interior paneling. We then carefully peel back the factory moisture barrier (vapor barrier) without tearing it. This critical step allows us to reach deep into the body cavity to vacuum out the remaining hidden glass shards and prepares the area for the mechanical extraction of the old vent glass frame.
Step 4: Removal of the Old Glass and Hardware
Depending on the specific configuration of the R52 vent glass, the remaining broken glass and its encapsulated frame must be cut out. Using a specialized cold knife and an auto glass wire-cutting system, we carefully slice through the original polyurethane adhesive bead securing the vent glass frame to the vehicle's pinch weld. We work with extreme precision to ensure the cutting wire does not scratch the vehicle's exterior paint or slice into the expensive convertible weather-stripping. Once the old assembly is freed, it is safely discarded.
Step 5: Precision Surface Cleaning and Primer Application
The secret to a leak-proof installation lies entirely in the surface preparation. After the old glass is removed, we trim the existing polyurethane bead down to a uniform thickness of 1-2 millimeters, creating an ideal bonding base. The vehicle's pinch weld is then thoroughly cleaned using a professional-grade, alcohol-based glass cleaner to remove any dirt, grease, or contaminants.
Next comes one of the most vital steps: the primer application. We apply a specialized, high-performance auto glass primer to any bare metal scratches on the pinch weld to prevent future rust formation. We also apply a specific glass primer to the frit band (the black painted edge) of the new OEM-quality vent glass. This primer acts as a chemical bonding agent, ensuring that the adhesive cross-links perfectly with both the vehicle frame and the new glass.
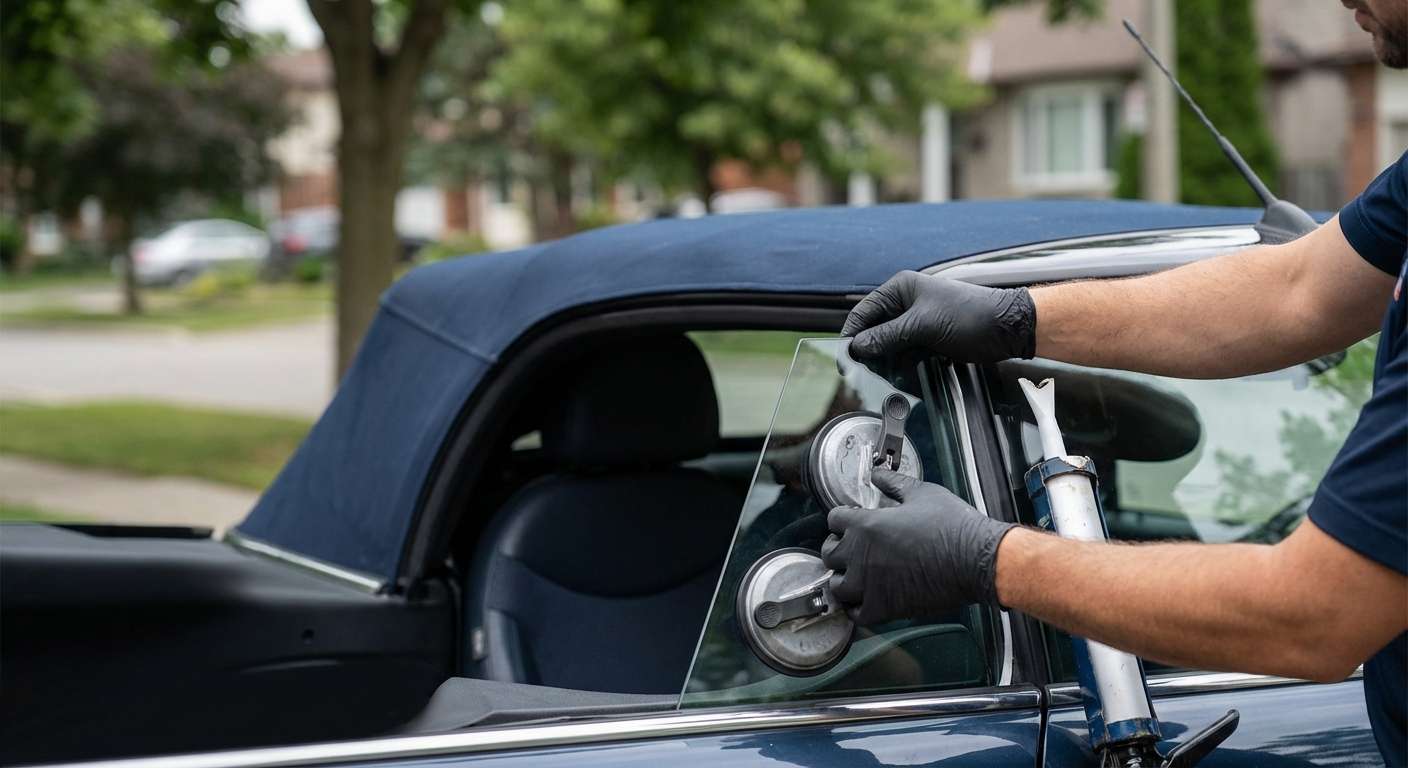
Step 6: Installation Using High-Quality Urethane Adhesive
With the surfaces prepped and primed, we prepare our premium, fast-curing automotive urethane adhesive. Using an electric caulking gun equipped with a precision V-notch nozzle, we lay down a continuous, perfectly uniform bead of adhesive around the perimeter of the pinch weld. The new MINI R52 vent glass is then carefully lifted and set into place. We apply precise, even pressure to ensure the glass seats fully into the adhesive, aligning the gaps perfectly with the adjacent door glass and the convertible top seals. We use specialized suction cups and retention tape to hold the glass firmly in its exact position while the urethane begins its initial flash-cure.
Step 7: Reassembly, Leak Testing, and Final Cleanup
While the high-quality adhesive cures, we begin the meticulous reassembly process. We carefully reseal the vehicle's vapor barrier, ensuring no moisture can enter the cabin. The interior trim, Torx screws, and panels are reinstalled precisely to factory torque specifications. Once reassembled, we clean the new vent glass with a streak-free, ammonia-free foaming cleaner. Finally, we conduct a visual and tactile inspection of the seals to guarantee there will be no wind noise or water leaks, restoring the quiet and comfort of your MINI's cabin.
Common Causes of Vent Glass Damage in the MINI R52
- Road Debris: High-speed impacts from gravel and rocks kicked up by commercial trucks on major GTA highways like the 401 or the 407.
- Vandalism and Break-ins: Due to its smaller size, thieves often target vent glass to reach interior handles without triggering glass-break sensors immediately.
- Extreme Temperature Fluctuations: The harsh Canadian winters and hot summers in cities like Vaughan and Markham can cause micro-fissures in aged glass to expand and ultimately shatter.
- Structural Flex: Convertibles inherently experience more chassis flex than hardtops. Over time, an improperly installed or aged vent glass can crack under the torsional stress of cornering or uneven driveways.
Why Professional Adhesive and Primers Matter
Many budget repair shops cut corners by using cheap silicone or standard construction sealants. As a Master Technician, I cannot stress enough how dangerous this is. Automotive glass is a structural component of the vehicle. During a collision or a rollover (which is particularly critical in a convertible like the R52), the glass helps route the impact energy away from the cabin. We utilize only high-quality urethane adhesive that meets or exceeds Federal Motor Vehicle Safety Standards (FMVSS). This guarantees that your vent glass will not pop out during airbag deployment and provides a watertight seal that lasts the lifetime of the vehicle.
Trust AlexWindshield for Your Auto Glass Needs
Replacing the vent glass on a 2005-2008 MINI Convertible requires an intricate balance of mechanical disassembly, chemical bonding, and aesthetic alignment. Don't trust your iconic British roadster to just anyone. AlexWindshield is recognized as the premier expert for mobile auto glass services across the Greater Toronto Area. Whether you reside in the bustling neighborhoods of Toronto, the suburban expanses of Markham, the growing communities of Richmond Hill, or the busy commercial sectors of Vaughan, our mobile technicians are ready to serve you with unparalleled expertise.
We stand firmly behind our craftsmanship. Every single auto glass replacement we perform comes backed by our comprehensive Lifetime Warranty. This warranty covers any issues related to leaks, wind noise, or manufacturer defects in the glass or adhesive for as long as you own your MINI. When you demand safety, convenience, and Master Technician-level perfection, contact AlexWindshield to restore your R52 MINI Convertible to its true glory.


