Restoring a Modern Classic: Quarter Glass Replacement for the 2003-2011 Honda Element
The 2003-2011 Honda Element is widely celebrated as one of the most uniquely versatile and instantly recognizable SUVs ever manufactured. Built for the adventurous driver, its utilitarian design features bi-parting side doors, a legendary wipe-down interior, and an unmistakable, rugged boxy silhouette. A defining characteristic of this iconic vehicle's design is its expansive rear quarter glass. Positioned just behind the rear doors, the quarter glass on the Honda Element is essential for eliminating blind spots, providing structural rigidity to the rear cabin, and completing the vehicle's distinct aesthetic profile. Because the Honda Element has been out of production since 2011, sourcing and properly installing specialized auto glass for it requires the expertise of a seasoned professional. When your quarter window is compromised, it exposes your vehicle to weather damage, road noise, and security risks, demanding immediate, high-level technical intervention.
Why the Honda Element Quarter Glass Requires Master Technician Expertise
Replacing the quarter glass on a Honda Element is not a simple plug-and-play procedure. Depending on the exact year and trim level (such as the EX, LX, or SC models), the quarter glass may feature specific factory tinting (privacy glass), encapsulated rubber moldings, or unique mounting hardware for pop-out vent configurations. At AlexWindshield, our Master Technicians possess the granular technical knowledge required to navigate the specific architecture of the 2003-2011 Honda Element. We strictly adhere to factory-approved installation protocols to ensure that your new glass perfectly matches the OEM specifications for safety, acoustics, and durability.
Our Comprehensive, Step-by-Step Quarter Glass Replacement Process
As senior auto glass specialists, we believe in complete transparency regarding our repair methodologies. When you book a quarter glass replacement with us, our technicians execute a rigorous, multi-step protocol to ensure a flawless and permanent bond.
Step 1: Complete Vehicle Assessment and Interior Protection
Before any tools are deployed, our technician conducts a thorough pre-inspection of the Honda Element's rear quarter panel to assess for any body damage or deep scratches that might affect the installation. Because safety and vehicle care are paramount, we begin by meticulously protecting your vehicle. We lay down heavy-duty protective drop cloths over the rugged, water-resistant seats and the rear cargo area. Exterior painted surfaces surrounding the quarter window are protected with specialized automotive masking tape to prevent any accidental scratches during the removal process.
Step 2: Interior Trim Removal and Extensive Glass Vacuuming
Unlike standard laminated windshields that crack but remain largely in one piece, the Honda Element's quarter glass is fabricated from tempered safety glass. When breached, tempered glass shatters instantly into thousands of small, granular shards. To perform a proper replacement, we must first address this debris. Our technicians carefully unclip and remove the interior plastic trim panels, D-pillar covers, and rear seatbelt anchor covers to expose the inner frame.
Once the interior framework is accessible, we utilize industrial-grade, high-suction shop vacuums to meticulously extract every single glass shard from the cabin. We vacuum the rear cargo floor, inside the door gaps, along the seat tracks, and deep within the vehicle's interior body cavities. Failing to remove these shards can result in highly irritating rattling noises while driving and poses a serious safety hazard to passengers and pets.
Step 3: Safe Removal of the Old Urethane and Glass Remnants
With the interior safely prepped and vacuumed, the technician focuses on the exterior frame. Using precision auto glass cut-out tools—such as cold knives, specialized wire-cutting systems, or oscillating power tools—we carefully slice through the original, hardened urethane adhesive holding the shattered glass frame in place. We carefully remove the old window encapsulation and any remaining shards attached to the frame, ensuring the vehicle's bodywork remains completely untouched and undamaged.
Step 4: Pinch Weld Preparation and Surface Cleaning
The structural integrity of the new window depends entirely on the preparation of the vehicle's frame, known as the pinch weld. Our technician trims the existing urethane bed down to a very thin, uniform layer of about 1-2 millimeters, which provides the optimal base for the new adhesive to bond to. We then use specialized, fast-drying, ammonia-free auto glass cleaners to completely strip away any dirt, road grime, moisture, and debris from the bonding surface. The new replacement quarter glass is also thoroughly cleaned, ensuring the ceramic frit band (the black painted border on the glass) is entirely free of manufacturing oils and fingerprints.
Step 5: Precision Primer Application
The application of primer is a critical, non-negotiable step in professional auto glass replacement. We apply an advanced glass primer directly to the frit band of the new Honda Element quarter glass. This primer acts as a chemical bonding agent and provides essential UV protection to prevent sunlight from degrading the new urethane over time. Additionally, if any bare metal was exposed on the vehicle's pinch weld during the removal process, we apply a high-grade pinch weld primer. This prevents future rust and oxidation, which is vital for preserving the longevity of older vehicles like the 2003-2011 Element.
Step 6: High-Quality Urethane Adhesive Application
Once the primers have flashed (dried) according to the manufacturer's specified timeframe, we apply the primary bonding agent. At AlexWindshield, we use only premium, industry-leading automotive urethane adhesive. Utilizing a specialized high-ratio caulking gun, the technician extrudes a perfectly uniform "V-bead" of urethane along the perimeter of the pinch weld. The V-bead shape is a critical technique used by Master Technicians; it ensures that when the glass is compressed into place, the adhesive spreads evenly without leaving any air gaps or channels where water could eventually leak into the cabin.
Step 7: Precision Installation of the New Quarter Glass
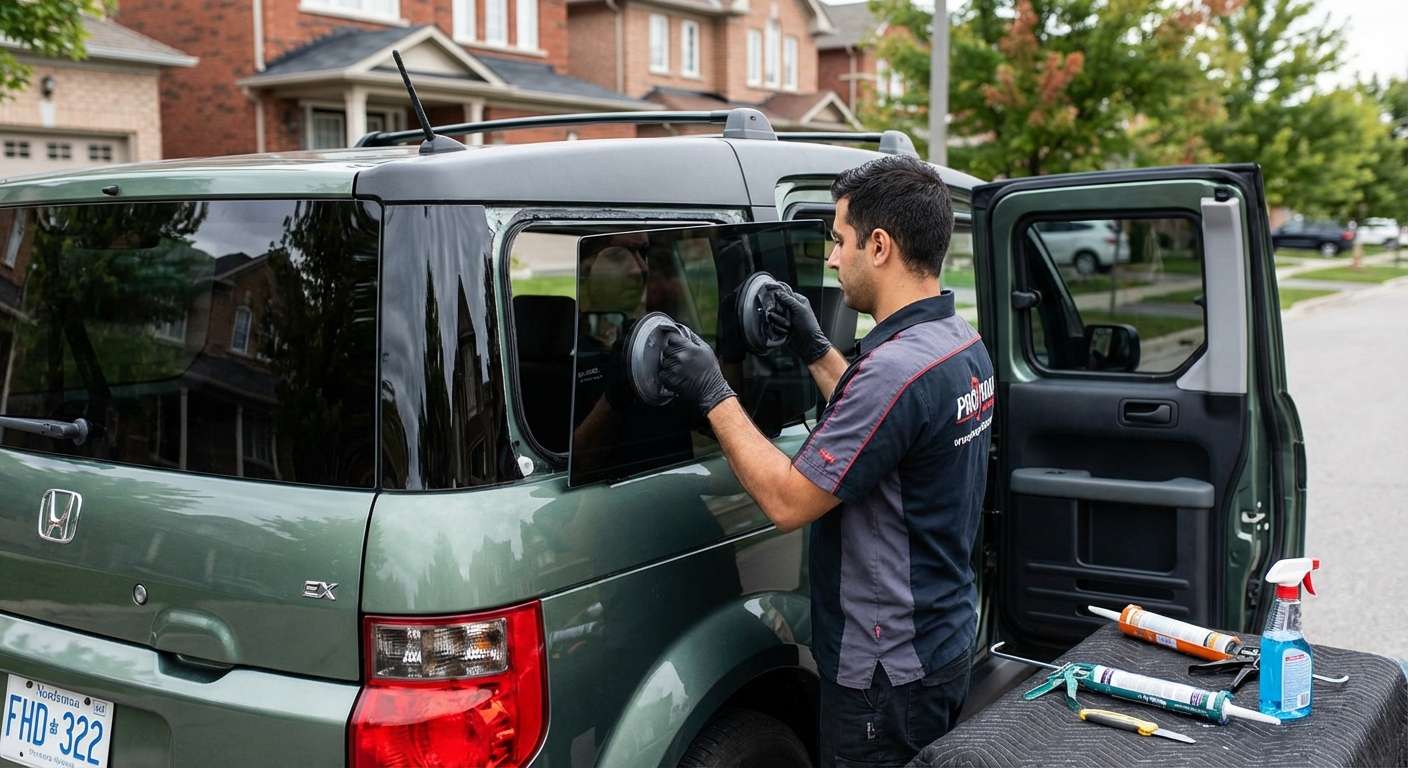
With the urethane properly applied, the new quarter glass is carefully lifted and maneuvered into position. Using suction cups and alignment techniques, the glass is pressed firmly into the urethane bed. We ensure the exterior gaps between the glass and the body panel are perfectly symmetrical, restoring the Honda Element's factory-original look. The glass is secured with retention tape to hold it perfectly in place while the chemical curing process begins.
Step 8: Final Cleanup, Reassembly, and Curing Time Verification
After the glass is set, our technicians reinstall all the interior trim panels, seatbelt anchors, and weather strippings that were removed in Step 2. We perform a final, comprehensive clean of the new glass and give the interior one last vacuuming. Finally, we calculate and inform you of the Safe Drive Away Time (SDAT). Because we use rapid-curing, high-quality urethane, you can typically drive your vehicle safely within an hour after installation, fully confident that the glass will remain secure even in the event of a collision or rollover.
Premium Auto Glass Materials for Your Honda Element
When replacing auto glass on discontinued, classic vehicles, material quality dictates the outcome. We source only the finest Original Equipment Equivalent (OEE) and OEM glass for your 2003-2011 Honda Element. This ensures that the tint color perfectly matches your existing factory privacy glass, and the encapsulation moldings are highly durable against the extreme Canadian climate. Our commitment to premium materials guarantees perfect visual clarity, superior structural strength, and zero wind noise.
Unmatched Mobile Auto Glass Service Across the Greater Toronto Area (GTA)
Driving a vehicle with a shattered quarter window is not only unsafe, but it also leaves your interior vulnerable to rain, snow, and theft. Recognizing the urgency of this situation, AlexWindshield provides highly responsive, fully equipped mobile auto glass repair services directly to your location throughout the Greater Toronto Area (GTA).
- Vaughan: Whether you are at home in Woodbridge or working near the Vaughan Metropolitan Centre, our mobile vans will arrive promptly to secure and repair your Honda Element.
- Richmond Hill: If you suffer glass damage while commuting along the Yonge Street corridor or parked in a residential neighborhood, we bring our Master Technician expertise right to your driveway.
- Markham: From Unionville to the bustling Markham civic center, we ensure that you do not have to drive a compromised vehicle across town. We perform the entire replacement safely on-site.
Our mobile units are outfitted with climate-controlled urethane storage, heavy-duty vacuums, and all the specialized tools required to perform a flawless, factory-grade installation in your driveway, office parking lot, or dealership.
Trust AlexWindshield for Your Honda Element Glass Needs
Your 2003-2011 Honda Element is a resilient, dependable companion, and it deserves to be serviced by technicians who respect its unique engineering. Replacing a specialized piece of encapsulated quarter glass requires patience, precision, and an unwavering commitment to safety. As the premier auto glass experts in the GTA, AlexWindshield combines decades of technical experience with unmatched customer convenience.
Do not let a shattered window compromise the safety or the striking appearance of your vehicle. Every single replacement we perform is backed by our comprehensive Lifetime Warranty, which guarantees our workmanship against any air leaks, water leaks, or manufacturer defects for as long as you own your vehicle. When you need unparalleled expertise and rapid mobile service in Vaughan, Richmond Hill, Markham, or anywhere in the GTA, contact AlexWindshield to schedule your Honda Element quarter glass replacement today.


