Restoring Executive Luxury: Back Glass Replacement for Audi A8 2004-2010 (D3)
The Audi A8 (D3 chassis, produced 2004-2010) is not merely a mode of transportation; it is a masterclass in automotive engineering, characterized by its revolutionary Audi Space Frame (ASF) aluminum construction and an interior designed for executive comfort. When the back glass of such a prestigious vehicle is compromised—whether due to vandalism, road debris, or thermal stress—it disrupts the structural integrity and the serene acoustic environment that defines the A8 driving experience. At AlexWindshield, we understand that replacing the rear windshield on an Audi flagship sedan requires surgical precision, distinct from standard vehicle glass servicing.
Unlike standard sedans, the Audi A8 D3 integrates complex electronics within its rear glazing, including diversity antenna systems and high-output heating elements. A generic installation can lead to radio interference, water leaks into the sensitive rear electronics modules, or corrosion of the aluminum frame. As Master Technicians serving the Greater Toronto Area (GTA), we specialize in the specific nuances of this German luxury liner.
Why the Audi A8 D3 Back Glass Requires Expert Handling
The back glass of the 2004-2010 Audi A8 serves multiple functions beyond visibility. It provides up to 30% of the vehicle's structural rigidity, particularly important for the aluminum space frame during cornering or in the event of a rollover. Furthermore, the D3 model utilizes a specific bonding capability to ensure the cabin remains whisper-quiet.
When you choose AlexWindshield, you are choosing technicians who understand:
- Aluminum Corrosion Prevention: The A8 body is aluminum. If a technician scratches the pinch weld and fails to use the correct etching primer, galvanic corrosion will occur, bubbling the paint and ruining the seal.
- Integrated Technology: Proper reconnection of the AM/FM/GSM antennas and defroster grids embedded in the glass.
- Acoustic Interlayering: Sourcing glass that matches the acoustic dampening properties of the original OEM specification.
Service Availability: Vaughan, Richmond Hill, and Markham
We recognize that an Audi A8 owner values time and convenience. Driving a vehicle with shattered rear glass is dangerous and exposes your luxury interior to the elements. AlexWindshield brings the repair facility to you. We offer comprehensive mobile auto glass replacement services across the GTA, with dedicated daily routes through Vaughan, Richmond Hill, and Markham.
Whether you are parked at a corporate office in Markham or your residence in Richmond Hill, our mobile units are equipped with generators, power tools, and climate-controlled urethane heaters to perform a factory-grade installation on-site.
The AlexWindshield Technical Process: Step-by-Step Replacement
Replacing the back glass on an Audi A8 D3 is a labor-intensive process that demands patience. Below is our detailed, A-to-Z protocol for ensuring your vehicle is restored to its original glory.
Step 1: Pre-Inspection and Damage Assessment
Before touching the vehicle, we perform a 360-degree inspection. We check the operation of the rear defroster (if partially intact) and inspect the rear deck (parcel shelf) for any pre-existing wear. We also verify the exact glass option—checking for tint levels, sunshade clearance, and antenna configurations specific to your VIN.
Step 2: Interior Protection and Preparation
The interior of an Audi A8 D3 usually features Valcona leather and Alcantara headliners. Protection is paramount.
- We apply protective seat covers to the front and rear seats.
- The exterior paint on the rear quarter panels and trunk lid is covered with non-abrasive protective tape and fender covers to prevent scratches from tools or glass removal.
- We cover the center console and sensitive rear climate controls to prevent dust or glass shards from entering the buttons.
Step 3: Disassembly of Rear Interior Trim
To access the urethane bead properly and ensure no damage to the headliner or rear deck, partial disassembly is required.
- C-Pillar Removal: We carefully unclip the interior C-pillar trims containing the airbag indicators and reading lights.
- Parcel Shelf Access: On the A8, the rear parcel shelf often sits tight against the glass. We may need to loosen or remove the rear deck trim to allow the new glass to slide in without scraping the upholstery.
- Electrical Disconnects: We locate the bus bars and connectors for the heating element and diversity antenna, carefully disconnecting them to avoid snapping the delicate soldering points on the vehicle harness.
Step 4: Managing Broken Glass and Debris
If the back glass has tempered and shattered into thousands of pieces, cleanup is a massive part of the job. Shards can migrate into the rear vents, seat tracks, and even inside the rear door panels if the windows were open.
- Industrial Vacuuming: We use high-powered industrial vacuums to extract glass from the rear parcel shelf, the rear seat crevices, and the floor mats.
- Door and Panel Inspection: While the back glass is fixed, the impact often sprays glass forward. We check the rear door pockets and under the front seats.
- Trunk Cleaning: When the back glass breaks, shards often fall into the trunk channel and the trunk itself. We vacuum the water drainage channels around the trunk seal to ensure no blockage occurs, which could lead to flooding later.
Step 5: Removal of the Old Glass and Adhesive
Using specialized tools designed for the hard German urethane:
- We utilize a Cold Knife or a wire-cutting system (like the fiber-line removal tool) to slice through the existing adhesive bead. The wire system is preferred on the A8 to prevent any contact with the aluminum body frame.
- Once the cut is complete, the remaining glass or the glass frame is carefully lifted away from the vehicle using suction cups.
Step 6: Pinch Weld Preparation (Critical Step)
The "pinch weld" is the metal shelf where the glass sits.
- We trim the old urethane down to a height of approximately 1-2mm. This "full cut" method ensures the new adhesive bonds to a fresh surface, not layers of old dirt.
- Aluminum Priming: If any bare aluminum was exposed during removal, we apply a specialized self-etching primer designed specifically for the Audi Space Frame. This prevents oxidation under the glass.
- The pinch weld is cleaned with a contaminant-free agent to remove road oils and silicone residues.
Step 7: Preparing the New Glass
While the vehicle prep dries, we prepare the new glass on our stand.
- The new glass is cleaned with a non-static glass cleaner.
- We apply a glass activator and black primer to the frit band (the black ceramic edge) of the new glass. This primer protects the adhesive from UV degradation and ensures a molecular bond.
- If the A8 requires a new molding or encapsulation gasket, it is attached to the glass edge at this stage.
Step 8: Application of High-Modulus Urethane
We use only High-Modulus, Non-Conductive Urethane (such as Sika or DuPont). Non-conductive adhesive is mandatory for the Audi A8 to prevent interference with the diversity antennas embedded in the glass.
- Using a high-ratio battery-powered caulking gun, we apply a triangular "V-bead" of urethane. This shape ensures that when the glass is compressed, the adhesive spreads evenly without air pockets, mimicking the factory robot installation.
Step 9: Installation and Decking
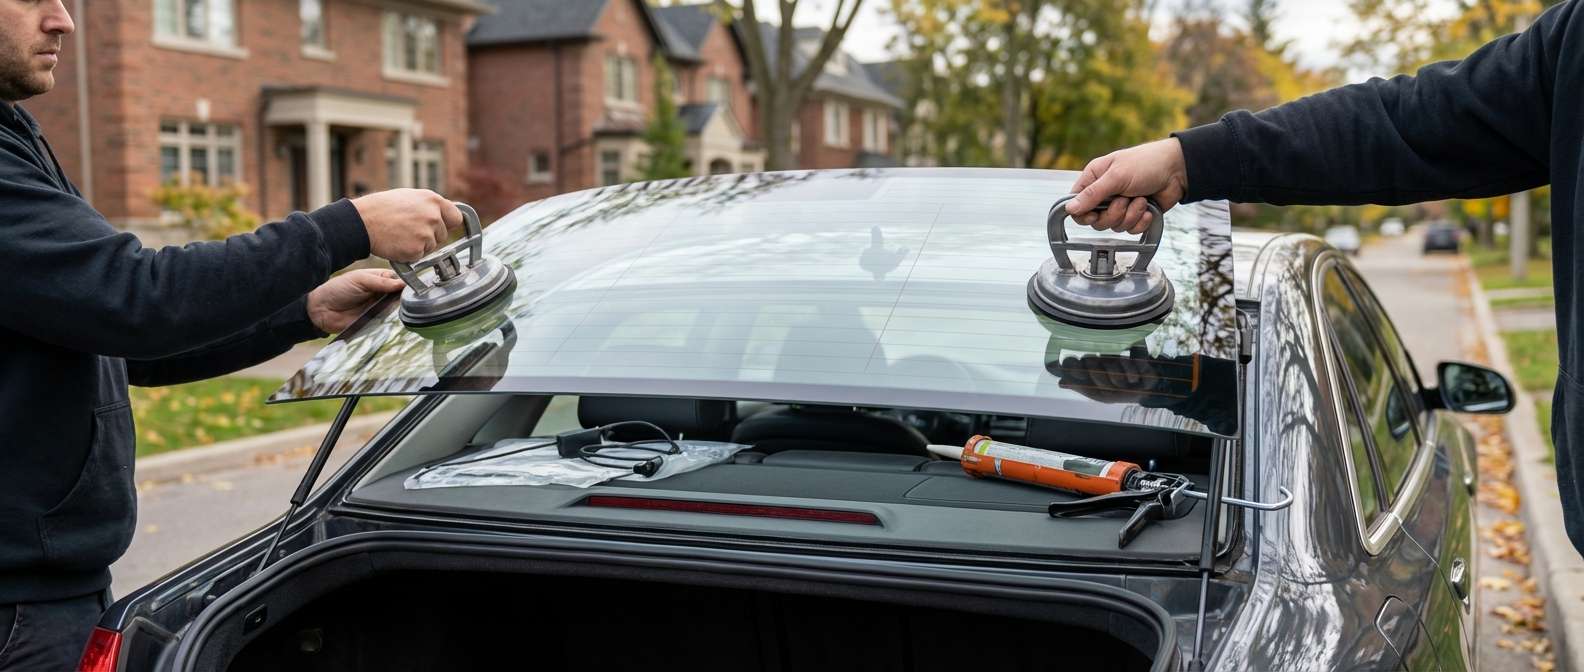
This is a two-person job for the wide A8 D3 back glass.
- Using heavy-duty suction cups ("vacuum lifters"), two technicians lift the glass over the trunk and carefully lower it onto the pinch weld.
- We align the glass with the roofline and the C-pillars, ensuring equal gaps on the left and right sides to prevent wind noise.
- The glass is gently "decked" (pressed) to wet out the adhesive against the primer.
Step 10: Reassembly and Final Clean
- We reconnect the heater grid and antenna wires, testing for continuity immediately.
- The interior trim, C-pillars, and parcel shelf components are reinstalled with care, ensuring all clips engage fully to prevent rattles.
- A final vacuum is performed to catch any debris dislodged during the installation.
- The glass is cleaned inside and out to a streak-free shine.
The Importance of Quality Materials for the D3 Chassis
The 2004-2010 Audi A8 utilizes sophisticated thermal management. Cheap aftermarket glass often has visible distortion or incorrect heater grid resistance, which can trigger fault codes in the vehicle's HVAC control module. At AlexWindshield, we use OEM-equivalent (OEE) glass from reputable manufacturers (such as Pilkington, Saint-Gobain, or PGW) that matches the original Audi specifications for thickness, tint, and curvature.
Furthermore, our adhesives offer a Safe Drive-Away Time (SDAT) of as little as one hour, meaning you can get back on the road in Vaughan or Markham without waiting days for the glue to cure.
Lifetime Warranty and Customer Commitment
We stand firmly behind our craftsmanship. Every back glass replacement performed by AlexWindshield on your Audi A8 comes with a Lifetime Warranty covering:
- Air noises and wind leaks: We guarantee a hermetic seal.
- Water leaks: No water will ever enter your cabin through our seal.
- Molding retention: Exterior trims will remain secure.
- Manufacturer defects: Distortion or stress cracks in the glass itself.
For the discerning owner of an Audi A8 D3, compromise is not an option. When you require back glass replacement in the Greater Toronto Area, trust the experts who understand the engineering behind your vehicle.
Contact AlexWindshield today to schedule your mobile service in Vaughan, Richmond Hill, or Markham. Drive with confidence knowing your luxury sedan has been serviced by the best.


