Restoring the Silhouette: Premium Back Glass Replacement for Audi A6 (1998-2004 C5 Platform)
The Audi A6 C5 generation (1998-2004) represents a pivotal moment in automotive design. With its distinctive Bauhaus-inspired curves and that sweeping, aerodynamic roofline, this vehicle redefined the executive sedan market. However, when the structural integrity of that sleek silhouette is compromised by shattered rear glass, it requires more than just a quick fix—it demands the touch of a Master Technician who respects the engineering lineage of German automobiles. At AlexWindshield, we specialize in the intricate restoration of these classic platforms, ensuring your Audi retains its safety, security, and aesthetic value.
Whether caused by road debris, vandalism, or thermal stress, a broken rear windshield on an Audi A6 is a significant inconvenience. Unlike the laminated glass found in your front windshield, the back glass is tempered safety glass designed to shatter into thousands of pebble-like pieces upon impact. This creates a unique set of challenges that requires specialized equipment and patience to resolve. Below, we detail our comprehensive, technician-led approach to replacing the back glass on your Audi A6 C5.
Why the Audi A6 C5 Requires Specialized Attention
The C5 platform utilizes a specific bonding architecture and electrical integration system that differs from modern, modular vehicles. The rear glass is not merely a window; it is a structural component that contributes to the torsional rigidity of the chassis. furthermore, the 1998-2004 models often integrate complex diversity antenna systems and high-amperage rear defroster grids directly into the glass.
Improper installation can lead to water leaks into the trunk (damaging the central locking pump common in these models), wind noise, or failure of the radio and heating elements. At AlexWindshield, we use OEM-equivalent glass that matches the curvature, tint, and electrical specifications of the original factory part.
Step-by-Step: The AlexWindshield Technical Replacement Process
As Master Technicians, we adhere to a rigorous protocol. We do not skip steps. Here is exactly how we handle the back glass replacement for your Audi A6, from the moment we arrive to the moment you drive away.
Phase 1: Site Preparation and Interior Protection
Before we touch a single tool, we safeguard your vehicle. The Audi A6 interior, often featuring premium leather and wood grain trim, must be protected from both glass shards and technician traffic.
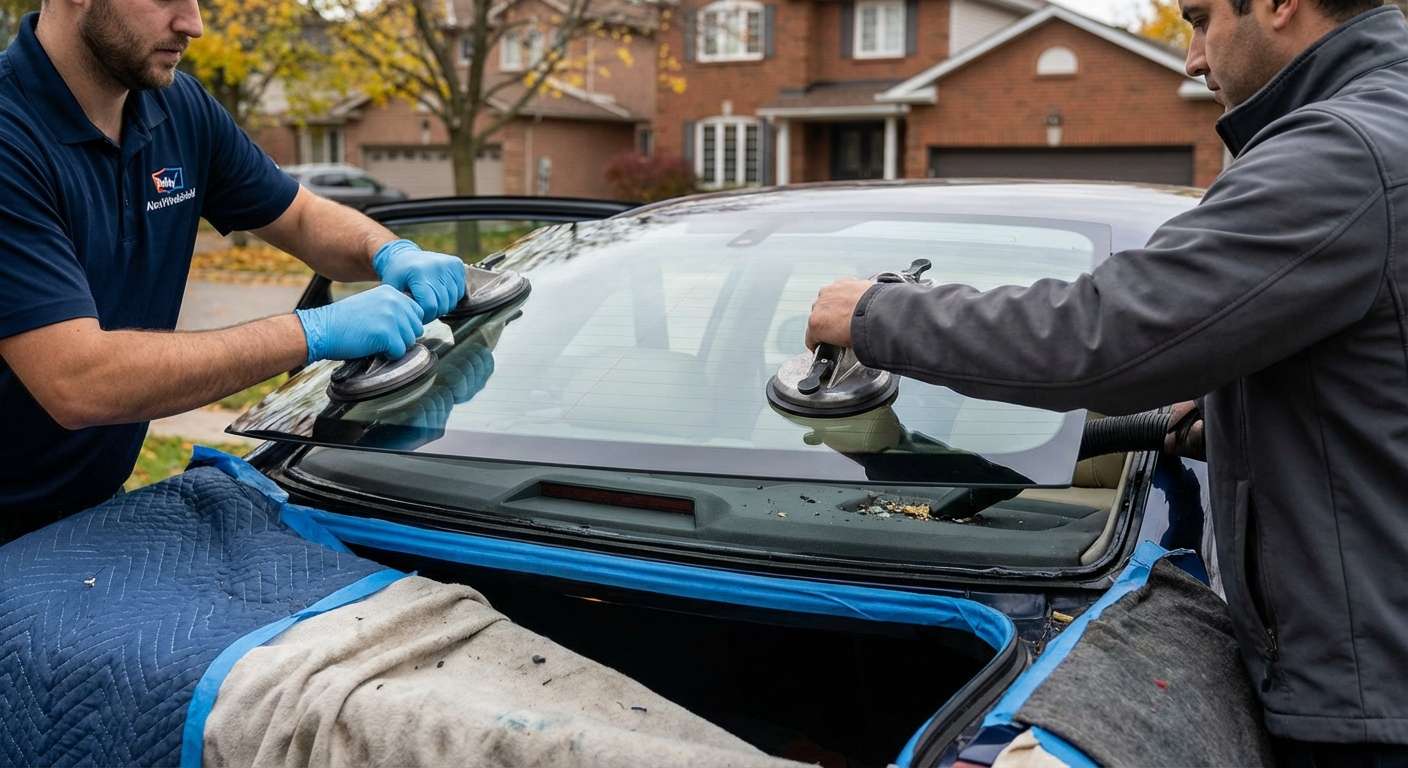
- Exterior Masking: We apply protective tape around the rear window frame (the pinch weld area) and the trunk lid to prevent accidental scratches during the glass removal process.
- Interior Shielding: We place heavy-duty covers over the rear seats, the rear deck (parcel shelf), and the floorboards. This catches falling debris and prevents urethane drips.
- Initial Assessment: We inspect the rear C-pillar trims and headliner condition. On older vehicles (1998-2004), plastic clips can become brittle. We identify any pre-existing wear before proceeding.
Phase 2: Debris Containment and Removal
This is the most time-consuming and critical aspect of replacing a tempered back glass. When the rear window of your A6 shatters, glass travels everywhere.
- Bulk Removal: We carefully remove the larger chunks of glass still adhering to the urethane bead using gloved hands and pliers.
- Industrial Vacuuming: We use high-powered, industrial-grade vacuums to extract glass shards from the rear parcel shelf, the rear seat crevices, and the floor mats.
- The "Hidden" Glass: We remove the trunk liner and vacuum the spare tire well. Shards often migrate through the rear deck speakers or vent flaps into the trunk area. We ensure no rattling glass remains.
- Door Panel Check: If the breakage occurred violently, we inspect the window channels to ensure no glass has fallen into vents or gaps that could cause rattles later.
Phase 3: Electrical Disconnection and Trim Removal
The Audi A6 C5 utilizes specific spade connectors for the defroster system.
- We carefully locate the positive and ground wires connected to the heating element tabs.
- Using specialized tools, we disconnect these wires without damaging the soldering on the vehicle's harness.
- If your specific A6 model includes the diversity antenna integrated into the glass, we carefully unclip the coaxial connections located under the C-pillar trim or headliner edge.
Phase 4: Cutting the Old Adhesive
Removing the residual glass and old adhesive requires a steady hand to avoid scratching the metal pinch weld, which leads to rust.
- The Cold Knife Method: We use an L-shaped cold knife to slice through the old urethane bead manually. This allows for precise depth control.
- Trimming the Bead: Once the glass frame is removed, we trim the existing urethane down to a thickness of approximately 1mm to 2mm. This "fresh cut" serves as the perfect base for the new adhesive to bond to.
- Rust Inspection: We inspect the metal frame. If any minor rust or scratches are found, we treat them immediately with a rust-inhibiting primer.
Phase 5: Chemical Preparation (The Bonding Surface)
Adhesion failure is not an option. We use a multi-stage chemical process to ensure the new glass stays in place for the life of the vehicle.
- Glass Cleaning: The new Audi A6 back glass is cleaned with an alcohol-based solution to remove manufacturing oils and release agents.
- Activator Application: We apply a Sika or DuPont activator to the ceramic frit band (the black border) of the new glass.
- Primer Application: A high-modulus black primer is applied to both the glass edge and the vehicle’s pinch weld. This primer blocks UV light (which degrades glue) and acts as the chemical bridge between the glass and the car body.
Phase 6: Adhesive Application and Setting
This is the moment of truth. We use only high-viscosity, rapid-cure urethane that meets or exceeds European safety standards.
- V-Bead Application: We apply the urethane in a high-profile triangular bead (V-bead). This shape ensures that when the glass is pressed down, the glue spreads evenly without air pockets, preventing leaks.
- Precision Setting: Using heavy-duty suction cups (and typically a two-technician lift for stability), we lower the new back glass onto the Audi A6 frame.
- Alignment: We align the glass with the roofline and trunk gaps to ensure it sits flush, preserving the aerodynamics and wind-noise reduction properties of the C5 design.
Phase 7: Reassembly and Final Checks
- Electrical Reconnection: We reconnect the rear defroster tabs and antenna wires, testing for continuity to ensure your rear defrost works perfectly in winter.
- Trim Installation: Any removed molding or interior C-pillar covers are snapped back into place.
- Final Clean: We perform a final vacuum of the work area and clean the new glass inside and out with streak-free cleaner.
Mobile Auto Glass Service Across the GTA
We understand that driving an Audi A6 with a shattered back window is dangerous and often illegal due to visibility obstruction. That is why AlexWindshield brings the repair shop to you. Our fully equipped mobile units operate extensively throughout the Greater Toronto Area (GTA).
Serving Vaughan, Richmond Hill, and Markham
Our technicians are locally positioned to provide rapid response times to key hubs north of Toronto:
- Vaughan: From Woodbridge to Maple, we can service your vehicle in your driveway or office parking lot near Vaughan Mills or Canada’s Wonderland areas.
- Richmond Hill: Whether you are near Yonge Street or off Bayview, our mobile vans are equipped to handle the climate-specific needs of glass replacement in this area.
- Markham: We service the entire tech hub and residential areas of Markham, ensuring that Unionville and Cornell residents have access to premium auto glass services.
The Importance of High-Modulus Adhesive
For an Audi A6, specifically the 1998-2004 era, body stiffness is key. We utilize High-Modulus, Non-Conductive Urethane. Why is "Non-Conductive" important? Because the Audi A6 C5 has antennas and heating elements embedded in the glass. If a technician uses cheap, conductive glue, it can interfere with your radio reception and GPS systems. At AlexWindshield, we strictly use adhesives that are chemically compatible with German luxury electronics.
Frequently Asked Questions
Q: How long until I can drive my Audi A6 after replacement?
A: We use rapid-cure adhesives that typically allow for a safe drive-away time (SDAT) of 60 minutes after installation, depending on humidity and temperature. However, we recommend avoiding high-pressure car washes for at least 48 hours.
Q: Will you clean up all the broken glass?
A: Yes. Vacuuming is a standard part of our Back Glass replacement service. We vacuum the seats, floor, rear deck, and trunk. While it is nearly impossible to guarantee removal of every single microscopic shard hidden inside the door frame, we remove 99% of accessible debris.
Q: Is the new glass heated?
A: Absolutely. We only install back glass that comes with the integrated heating grid to match your Audi’s original specifications.
Trust AlexWindshield: Your Audi Expert
The Audi A6 (C5) is a vehicle that deserves respect and technical expertise. Do not trust its repair to generalists who might damage the delicate electronics or fail to properly seal the cabin against the harsh Canadian weather.
At AlexWindshield, we combine old-school craftsmanship with modern adhesive technology. We stand behind our workmanship with a Lifetime Warranty against leaks and installation defects for as long as you own the vehicle.
Ready to restore your Audi? Contact AlexWindshield today for a quote and experience the premier mobile auto glass service in Vaughan, Richmond Hill, Markham, and the entire GTA.


