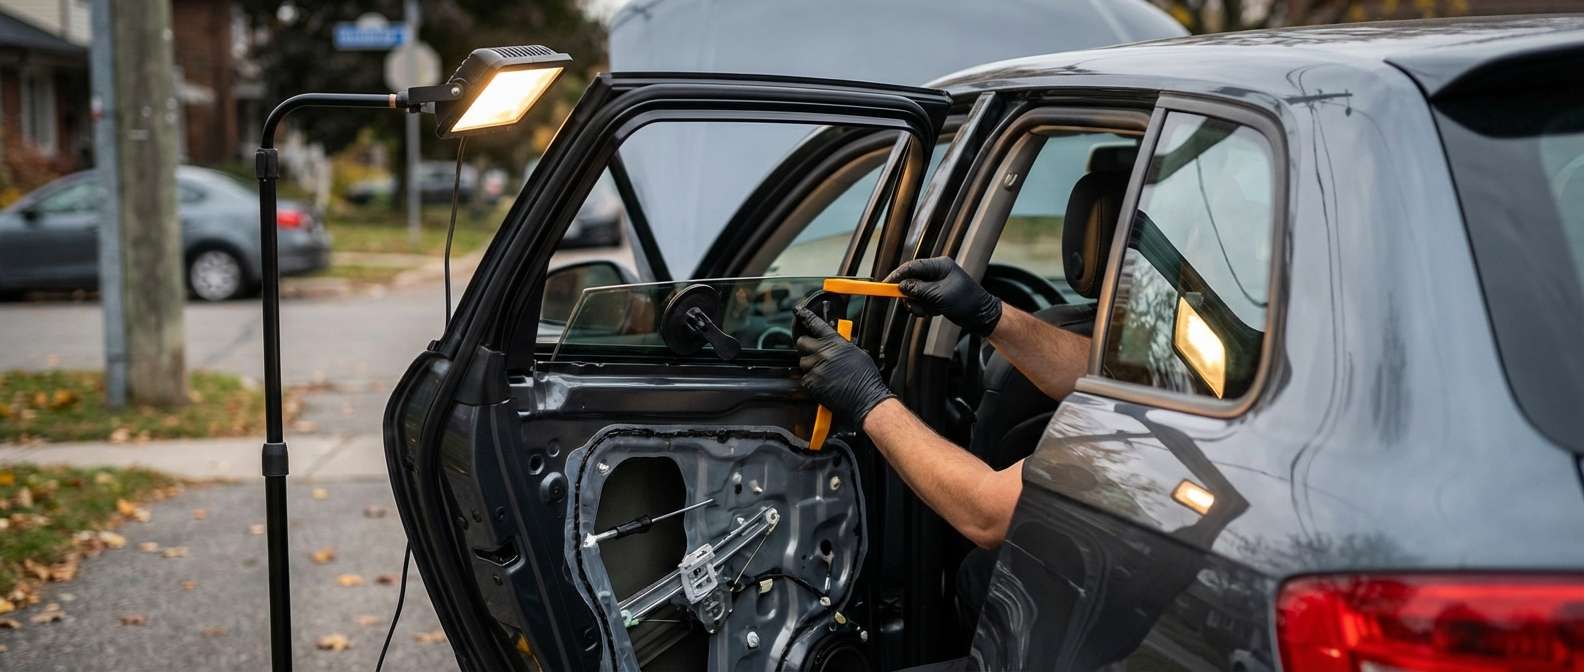
Restoring the Sportback Silhouette: Expert Vent Glass Replacement for Audi A3 (2006-2013)
The Audi A3 (8P Generation, 2006-2013) represents a pivotal era in compact luxury engineering, blending the versatility of a sportback with the refined driving dynamics synonymous with German manufacturing. Owning this vehicle means appreciating the tight tolerances of its bodywork and the sophisticated assembly of its cabin. However, when the vent glass—that small, triangular stationary window often located in the rear door frame—is shattered due to road debris or, more commonly, an unfortunate break-in, it disrupts both the aesthetic lines and the security of your vehicle. Unlike a standard windshield, replacing the vent glass on an Audi A3 requires navigating complex door internals, side airbags, and window regulators.
At AlexWindshield, we do not view this as a simple swap. We view it as a surgical restoration of your vehicle's integrity. Whether you drive the 2.0T or the 3.2 Quattro, our Master Technicians utilize OEM-specification glass and adhesives to ensure your A3 remains as quiet and secure as the day it left Ingolstadt.
The Critical Nature of Vent Glass in the Audi A3
Many vehicle owners mistakenly believe that the smaller the piece of glass, the easier the replacement. In the context of the Audi A3 2006-2013, the reality is quite the opposite. The vent glass serves as a structural component within the door frame, providing tension for the window run channel which guides your main roll-down window. If this glass is installed incorrectly, or if the shards from the previous break are not meticulously removed, it can lead to:
- Water Leaks: Compromising the sensitive electronics within the door module.
- Wind Noise: Creating a whistling sound at highway speeds common on the 407 or 401.
- Regulator Failure: Glass shards lodging in the gears of the window motor.
- The "Maraca" Effect: An incessant rattling inside the door panel that ruins the luxury driving experience.
Serving the Greater Toronto Area: Vaughan, Richmond Hill, and Markham
We understand that driving an Audi with a broken window is stressful, unsafe, and leaves your interior exposed to the harsh Canadian elements. That is why AlexWindshield brings the repair shop to you. Our fully equipped mobile units specialize in local service across the Greater Toronto Area (GTA).
If you are located in Vaughan, near the busy interchange of Highway 400 and Rutherford, we can perform the replacement in your driveway. For our clients in Richmond Hill, we frequently service vehicles near Yonge Street and Major Mackenzie. We also have a strong presence in Markham, ensuring that whether you are at an office park or your home, a Master Technician is just a phone call away. We eliminate the need for you to drive a compromised vehicle to a shop.
Detailed Technical Process: Audi A3 Vent Glass Replacement
As a Senior Specialist at AlexWindshield, I adhere to a strict, rigorous protocol when approaching the Audi A3 2006-2013. This is not a rushed job; it is a technical procedure requiring patience and specialized tools. Below is the step-by-step process we utilize to ensure factory-level results.
Phase 1: Site Preparation and Vehicle Protection
Before a single tool touches your Audi, we prepare the environment. Working with shattered tempered glass requires containment protocols.
- Exterior Masking: We apply high-grade painter's tape to the painted surfaces of the door frame and the B and C pillars. This prevents accidental scratches from glass removal tools or vacuum hoses.
- Interior Shielding: The Audi A3 8P often features premium leather or cloth interiors. We place protective covers over the seats, the center console, and the floor mats to catch any falling debris during the disassembly phase.
- Glass Stabilization: If the vent glass is cracked but not fully fallen out, we apply a stabilization film to hold the pieces together during removal, preventing an explosion of shards into the cabin.
Phase 2: Door Panel (Card) Removal
Accessing the mounting points for the vent glass on an Audi A3 requires the complete removal of the interior door panel. This is a delicate process as 2006-2013 models have plastic clips that can become brittle over time.
We begin by locating the hidden fasteners. On the A3, these are typically concealed behind the decorative trim strip and under the armrest. Using non-marring nylon pry tools, we gently unclip the trim to expose the Torx screws (usually T25 or T30). Once the screws are removed, we use a specialized wedge tool to pop the door card retainers from the metal door shell. We carefully disconnect the wiring harness for the window switch, door locks, and ambient lighting, ensuring no tension is placed on the cables.
Phase 3: Debris Mitigation and Vacuuming
This is the step that separates AlexWindshield from budget providers. When vent glass breaks, it falls inside the door shell.
- Vapor Barrier Management: We carefully peel back the foam or plastic vapor barrier. Cutting this barrier is avoided whenever possible to maintain the vehicle's moisture seal.
- Deep Vacuuming: Using a high-powered industrial vacuum with a flexible crevice attachment, we reach into the deepest recesses of the door bottom. We blind-sweep the entire bottom seam of the door to capture every single cube of tempered glass.
- Speaker Removal (If Necessary): occasionally, glass shards get trapped behind the door speaker magnet. If needed, we drill out the rivets or unscrew the speaker to vacuum behind it, ensuring zero rattles.
Phase 4: Disassembly of the Run Channel and Divider Bar
The vent glass on the Audi A3 is separated from the main roll-down window by a vertical metal guide called the divider bar. To install the new glass, this bar often needs to be manipulated.
We lower the main window to a service position. Then, we locate the bolts securing the divider bar at the top of the door frame and the bottom inside the door shell. By loosening these bolts, we create enough "play" in the run channel. This relieves the pressure holding the remnants of the old vent glass gasket and creates the clearance necessary to slide the new glass into position.
Phase 5: Surface Preparation and Primer Application
If the vent glass is an encapsulated part that bonds directly to the body (common on rear quarters), or if it slots into a rubber gasket, the surface must be chemically clean.
We clean the metal frame where the glass seats using an alcohol-based solvent to remove road grime, old adhesive, and grease. If the glass is bonded, we apply a black primer to any exposed metal scratches caused by the breakage. This primer serves two purposes: it prevents rust formation on your Audi's frame, and it promotes molecular bonding with the urethane adhesive.
Phase 6: Installation of the New Vent Glass
We utilize only high-quality, DOT-certified glass that matches the tint and curvature of your Audi A3's original windows.
The Insertion: Maneuvering the new vent glass requires finesse. We lubricate the rubber weatherstripping with a silicone-based spray to reduce friction. We tilt the glass, inserting the leading edge into the frame, and carefully slide it down into the track. We then manipulate the divider bar back into its upright position, sandwiching the new glass firmly in place.
Alignment: Before tightening any bolts, we check the alignment. The spacing around the glass must be uniform to ensure the exterior chrome or black trim lines up perfectly with the rest of the car. Once aligned, we torque the divider bar bolts to factory specifications.
Phase 7: Reassembly and Function Testing
With the glass physically installed, the job is only half done. We proceed to reassemble the door.
- Run Channel Check: We roll the main window up and down several times. It must move smoothly without binding or slowing down near the new vent glass. If there is resistance, we adjust the divider bar angle.
- Vapor Barrier Reseal: We re-adhere the vapor barrier using butyl tape if the original seal was compromised. This is vital for preventing water from entering your cabin and causing mold in the carpet.
- Door Panel Installation: We reconnect all wiring harnesses (testing the switches immediately) and snap the door panel back onto the clips. All Torx screws are replaced, and decorative trim is snapped back into position.
Phase 8: Final Clean and Inspection
Our Mobile Auto Glass service concludes with a final cleanup. We wipe down the new glass with ammonia-free cleaner to remove any fingerprints or lubricant residue. We perform a final vacuum of the vehicle's interior floor and seats to ensure no stray glass shards migrated during the installation. We inspect the exterior weatherstripping to ensure a watertight seal.
Why Trust AlexWindshield for Your Audi A3?
The Audi A3 is a vehicle that demands respect regarding maintenance. Generic auto glass shops often rush the "hidden" steps, leading to rust, rattles, and water damage months down the line. At AlexWindshield, we combine technical mastery with customer convenience.
We are proud to serve the communities of Vaughan, Richmond Hill, and Markham with a level of service that rivals the dealership, delivered right to your doorstep. We stand behind our craftsmanship with a robust guarantee.
The AlexWindshield Lifetime Warranty
We are confident in our process. Every vent glass replacement comes with our Lifetime Warranty covering:
- Water Leaks: Guaranteed watertight for as long as you own the vehicle.
- Air Leaks: No whistling or wind noise issues.
- Workmanship: We guarantee that all trim and panels are reinstalled correctly without damage.
Don't let a broken vent glass compromise the safety or style of your Audi A3. Trust the Master Technicians who know your vehicle inside and out.
Contact AlexWindshield today to schedule your mobile Audi A3 vent glass replacement in the GTA. Drive with clarity, drive with confidence.


